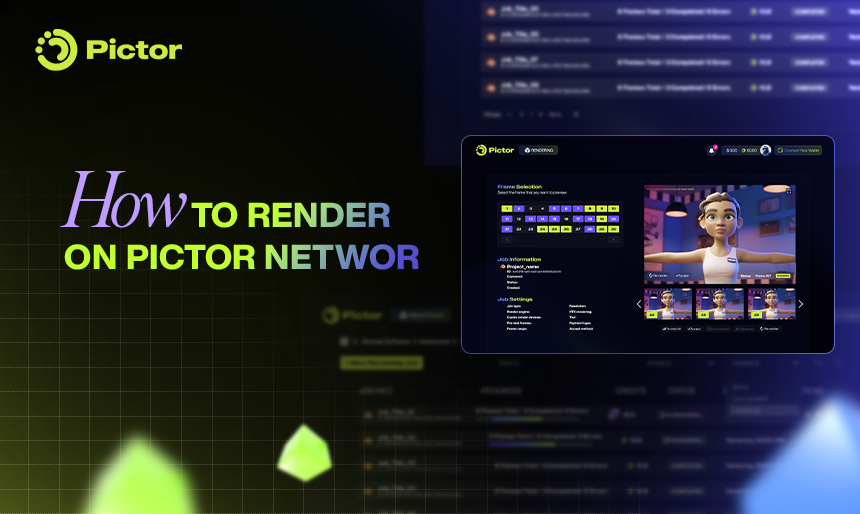
“Your scene is ready. Now render it with real decentralized GPU power on Pictor Network.”
Intro: Start Rendering Smarter, Not Harder
Rendering should feel like the creative finish line, not a technical roadblock. But for many artists, long queues, locked-down platforms, and unpredictable costs still make it harder than it should be.
With Pictor Network, you get a faster, more flexible, and affordable way to bring your work to life, powered by a high-performance decentralized GPU network.
In this tutorial, we’ll walk you through every step: uploading your scene, configuring your job, and downloading the final result. Whether it’s your first render or your hundredth, this guide will get you started fast.
Let’s dive in.
Step-by-Step Guide to Render on Pictor Network
Create a Pictor Account
Go to cloud.pictor.network and select from several supported services such as Google, X, Apple, or Worldcoin.
- Select your preferred option to create a Pictor account.
- Then, log in to your account.
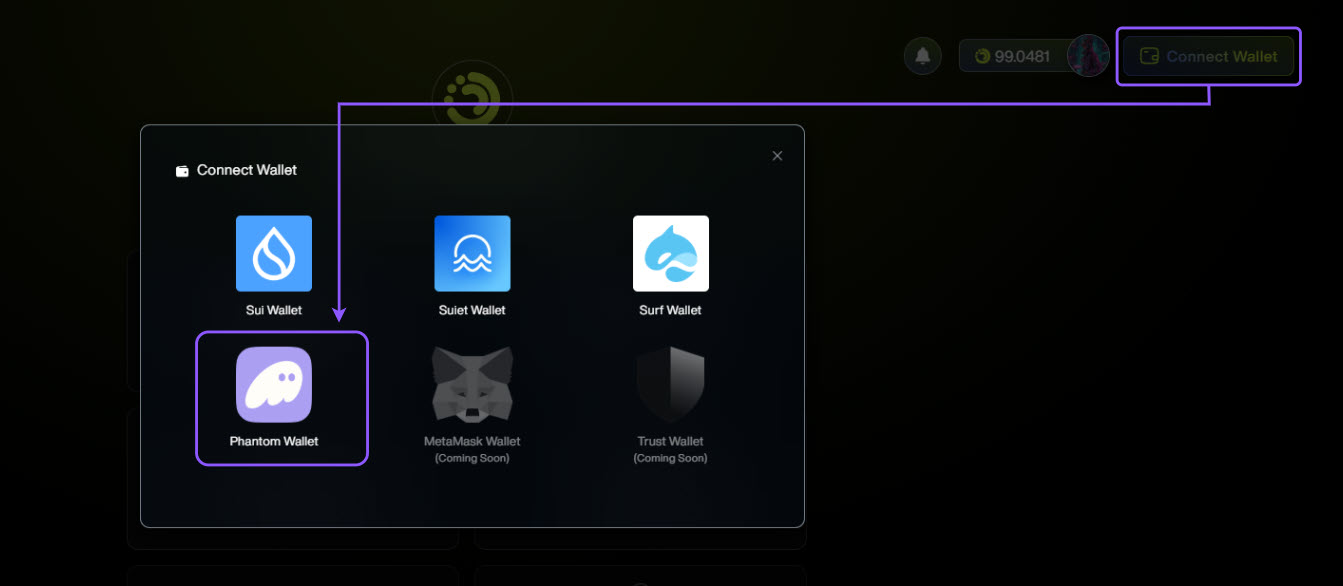
Connect Crypto Wallet
Currently, Pictor offers two payment options: Crypto and Fiat Money.
- To pay for the network services with Crypto, you must connect a Crypto Wallet to your Pictor account.
- If you want to pay with Fiat Money, skip this “Connect Crypto Wallet” step.
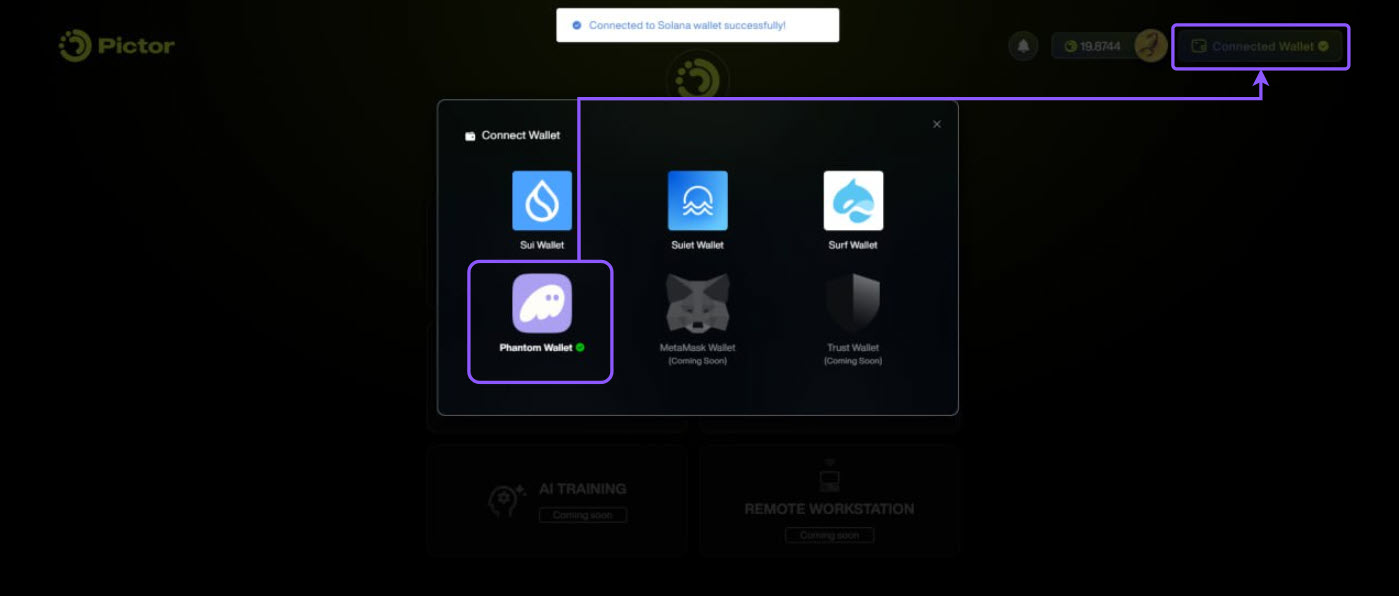
- Choose the Connect Wallet button at the upper right.
- Select a supported wallet.
- Connect your wallet to your Pictor account.
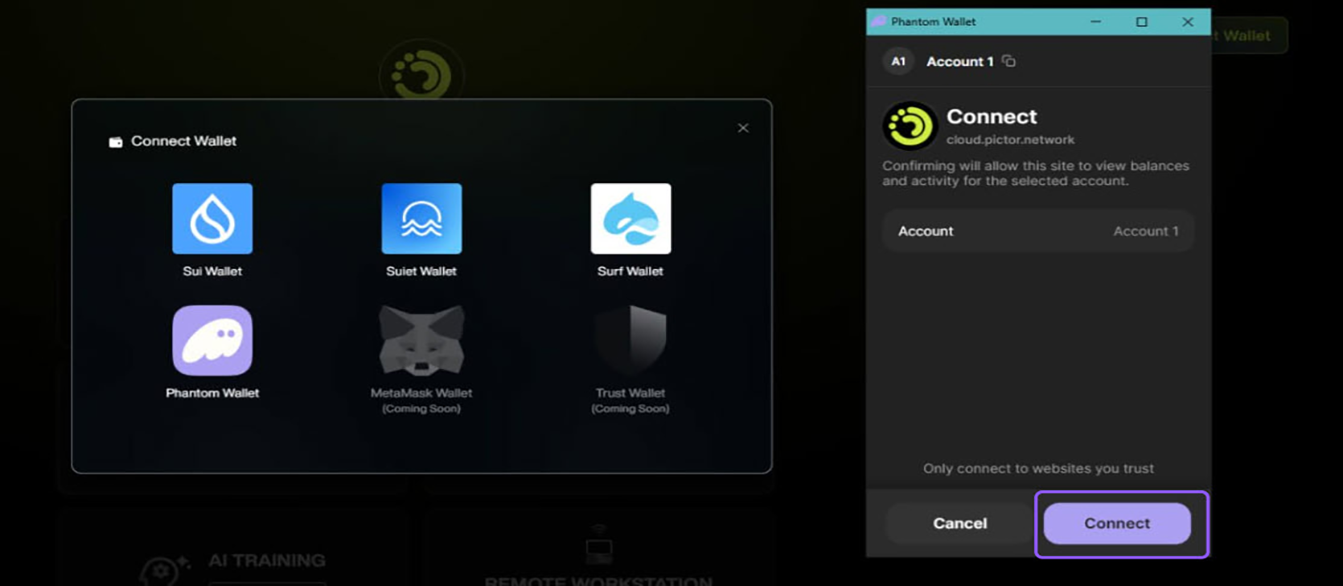
After the wallet is connected successfully, it will display right next to your profile icon like this:
Add Funds
The Pictor payment system is deposit-based, meaning you must add funds to your accounts before submitting a rendering job. Pictor supports two payment methods: Crypto and Fiat Money.
Add Funds in Crypto
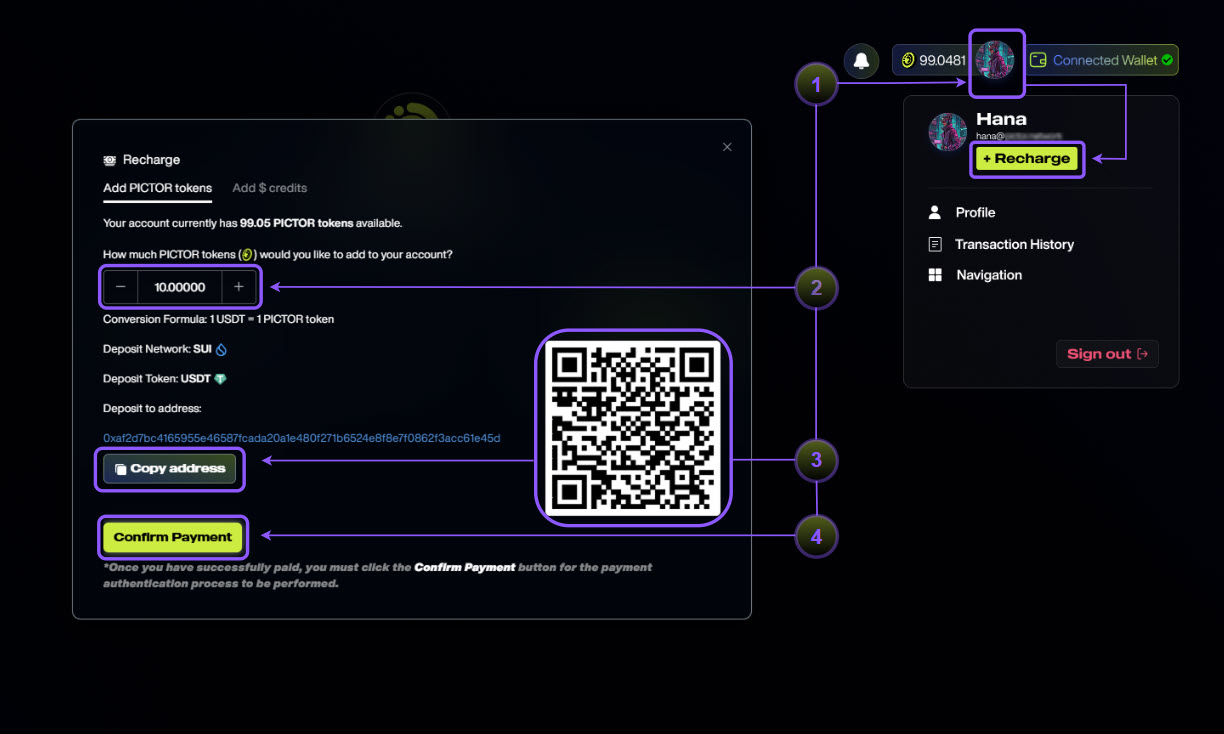
- Click on your profile icon in the upper right corner and choose Recharge.
- In the ‘Add PICTOR tokens‘ page, enter the deposit amount.
- Click Copy address or scan the QR code with your wallet and send payment.
- Click Confirm Payment after sending to verify the transaction.
Add Funds in Fiat Money
- Click on your profile icon in the upper right corner and choose Recharge.
- In the ‘Add $ credits‘ page, choose either the Onepay, PayPal, Banking, or Stripe method.
- Enter the deposit amount.
- Click Deposit.
Note: Adding funds in fiat money method will work soon.
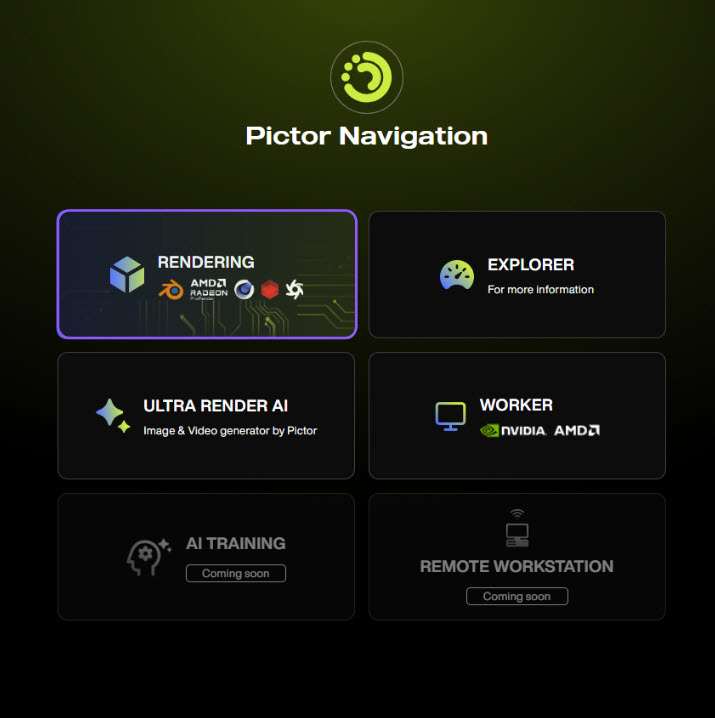
Create Rendering Job
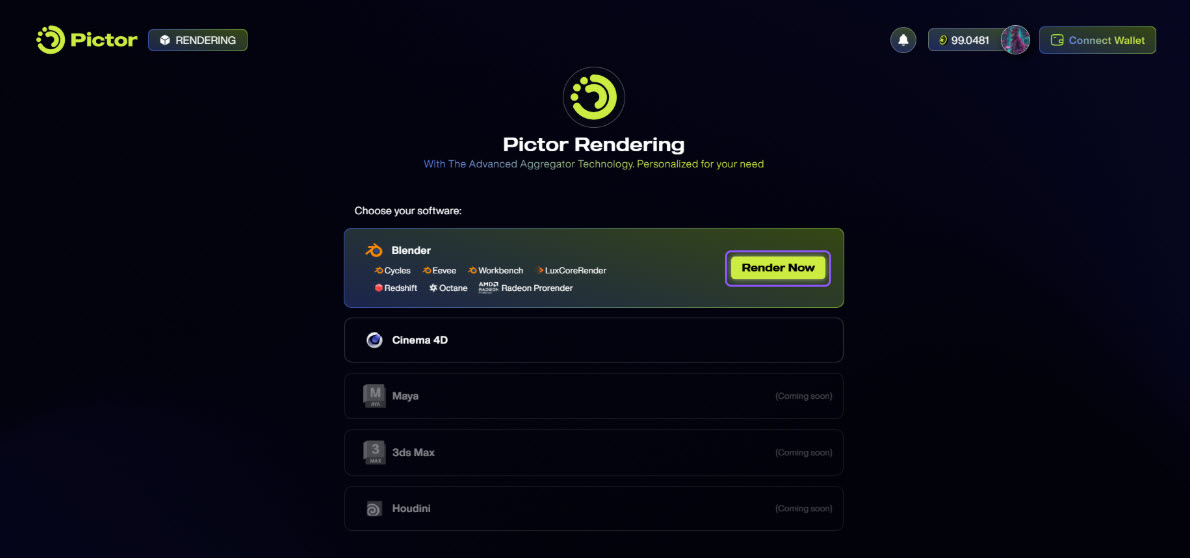
- Go to the RENDERING portal.
- Choose the 3D software you want to use for rendering your project and click Render Now.
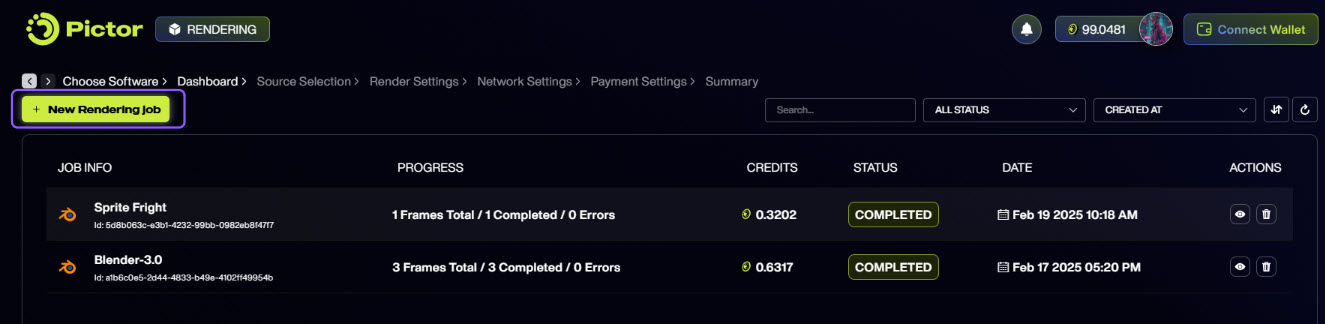
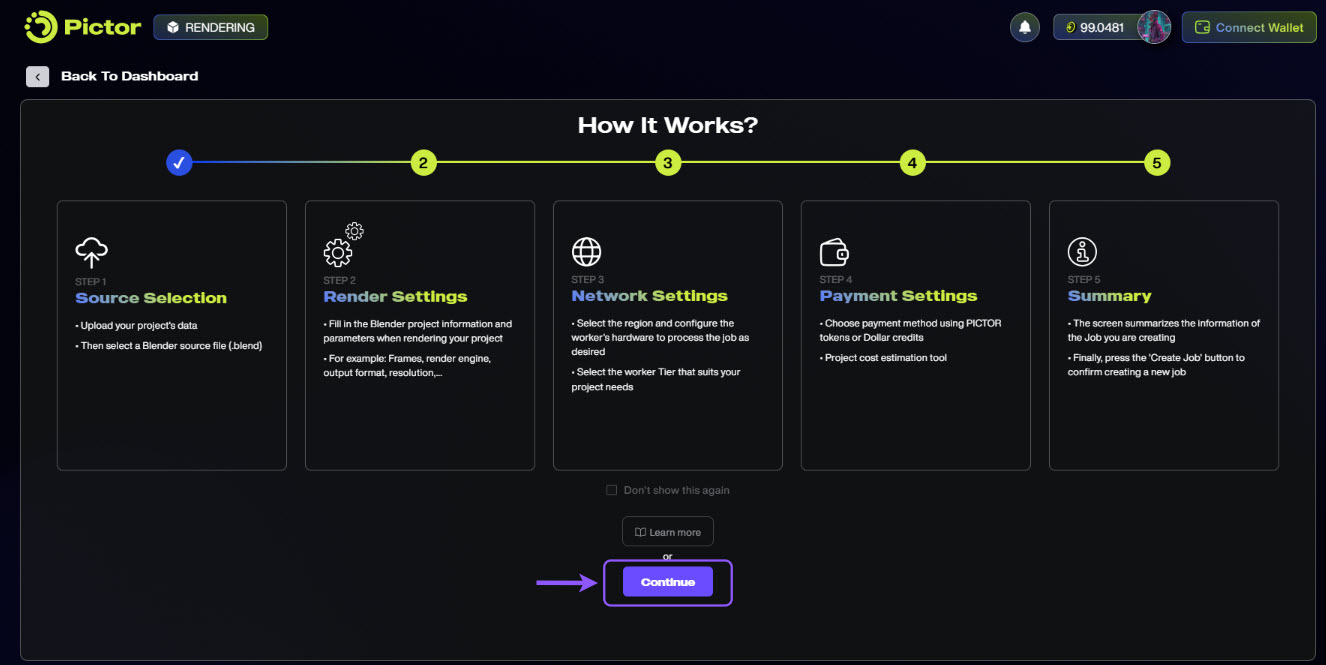
- Choose the New Rendering Job button.
A page shows the How It Works guide with 5 simple steps: choose the Continue button.
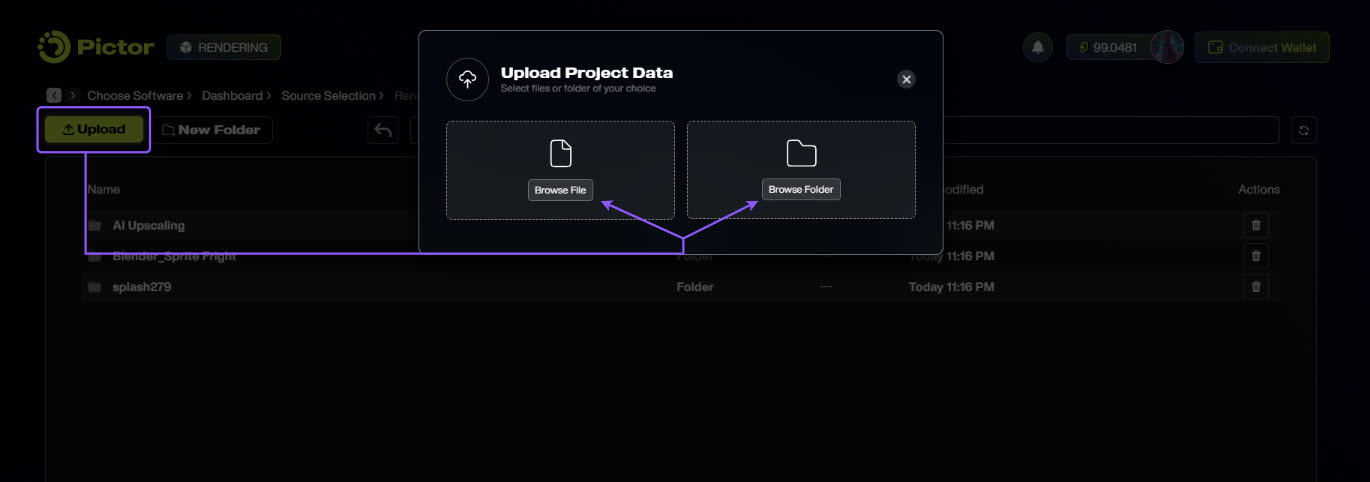
- Upload your project files
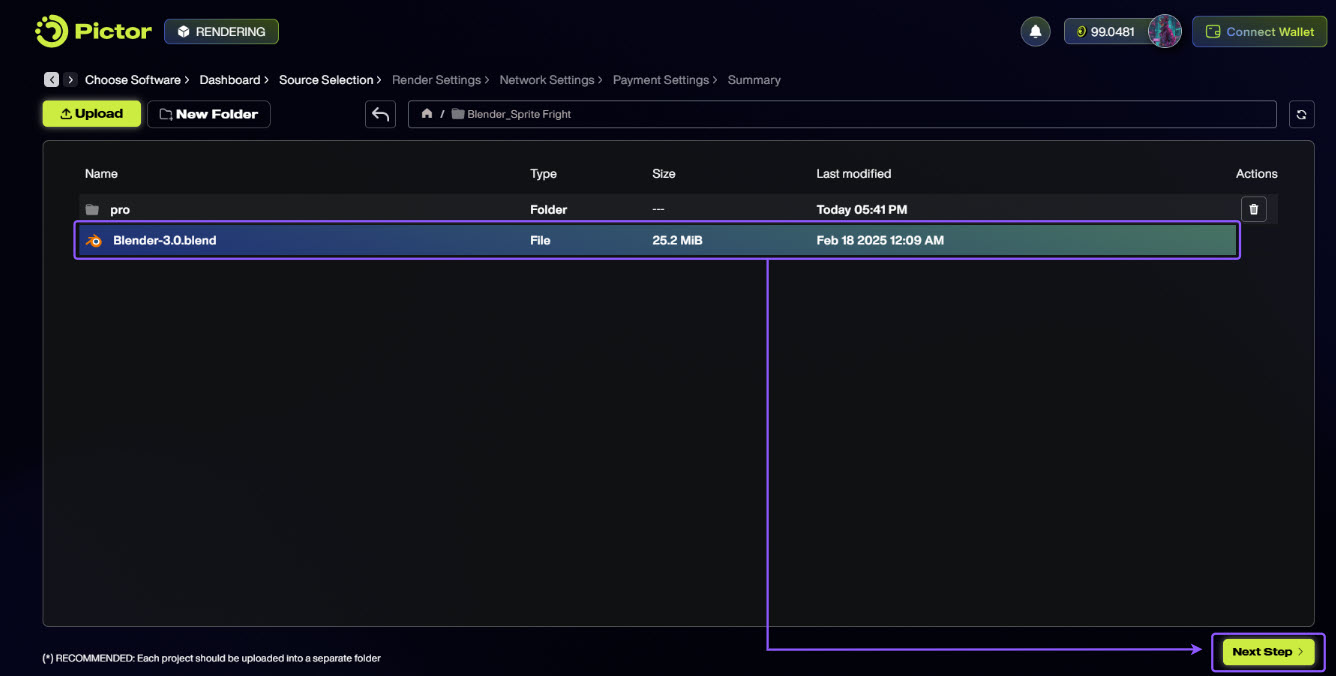
On the ‘Source Selection’ page, choose the Upload button to upload your data by folder or file.
Then, select the uploaded render file (e.g, the .blend file), and click Next Step.
- Configure Render Settings
- Information: Add a Job name and Job comment, and choose the Software and its Version.
- Scene Parameter Settings: Select Render engine, Render device, Output format, Pre-test frame, and Render frame.
- Resolution: Choose between HD, FHD, QHD, 2K, 4K, and 8K.
- Render Setting: Configure Frame per node, Timeout alert, Timeout analysis, and Timeout stop.
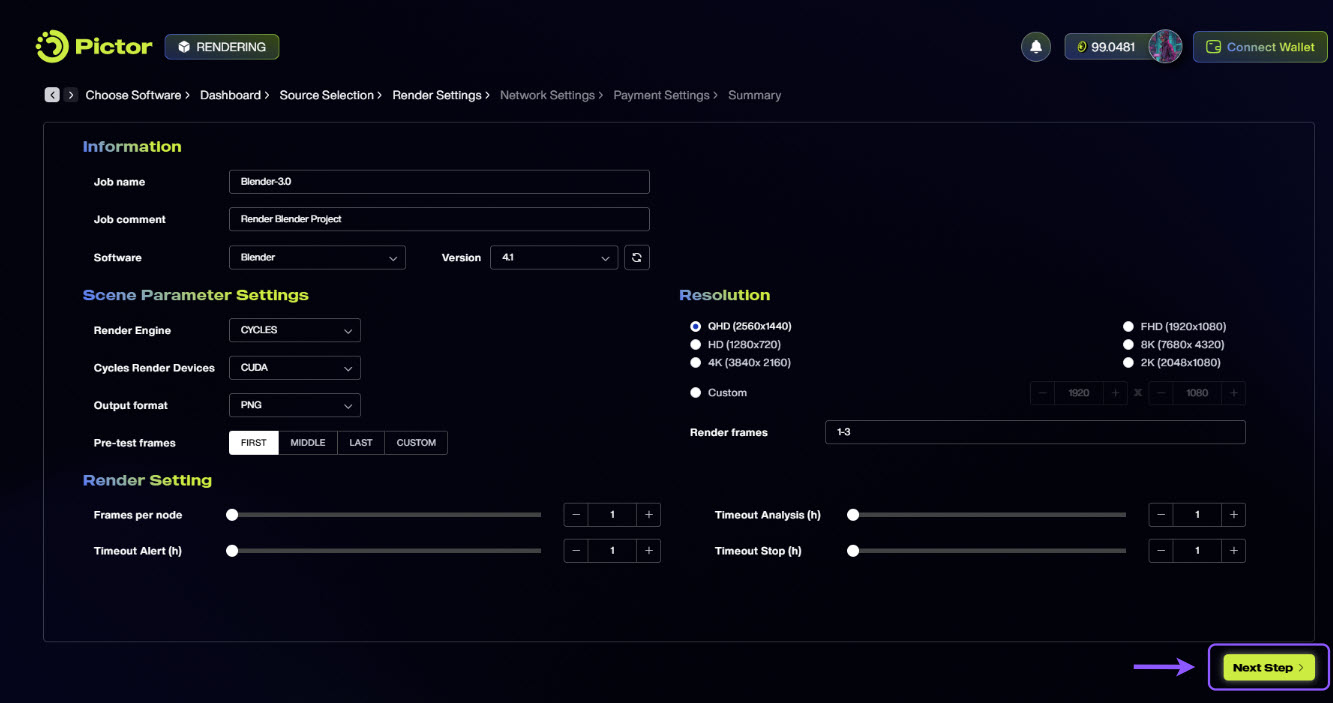
Then, click Next Step.
- Configure Network Settings
- Select the Worker Location.
- Select the Hardware configuration: GPU manufacturer, GPU model, GPU number, and RAM.
- Select Pricing Tier: Tier 3 – Trusted Partners, Tier 2 – Prioritize productivity, Tier 1 – Cost optimization, or NO TIER.
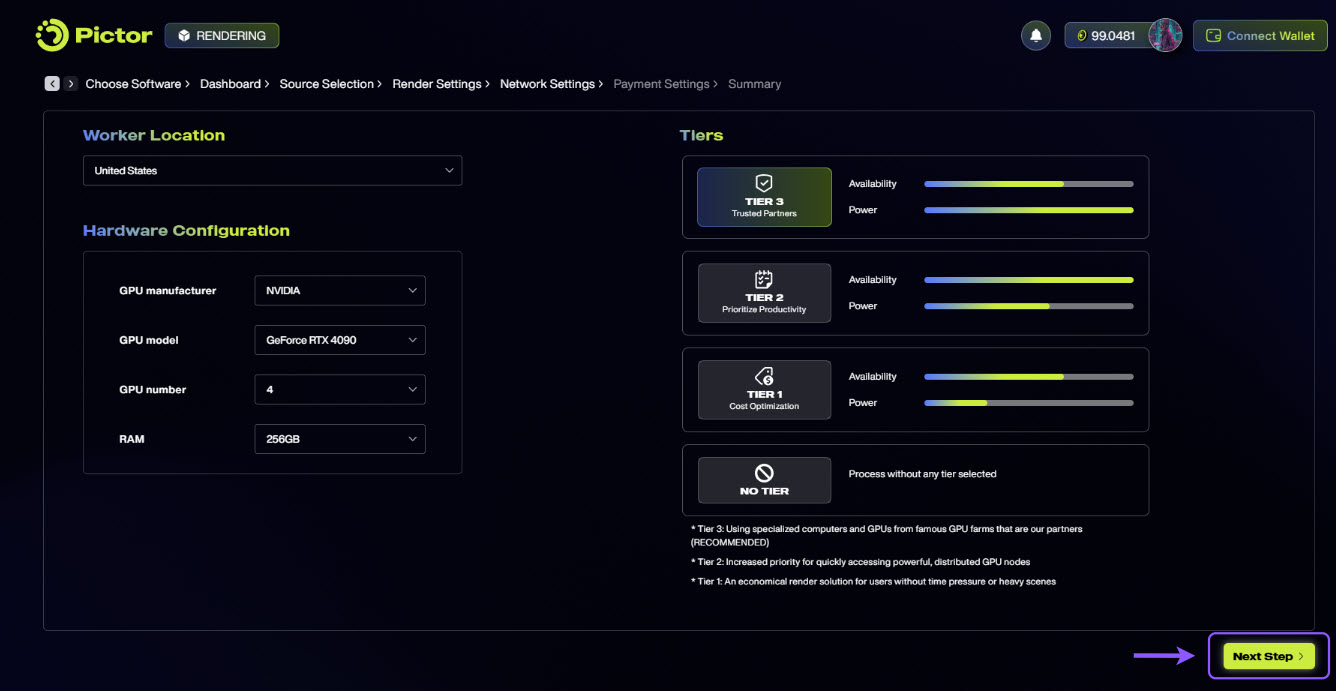
Then, click Next Steps.
- Configure Payment Settings
Select either PICTOR tokens or USD to pay for the rendering services.

And click Next Steps.
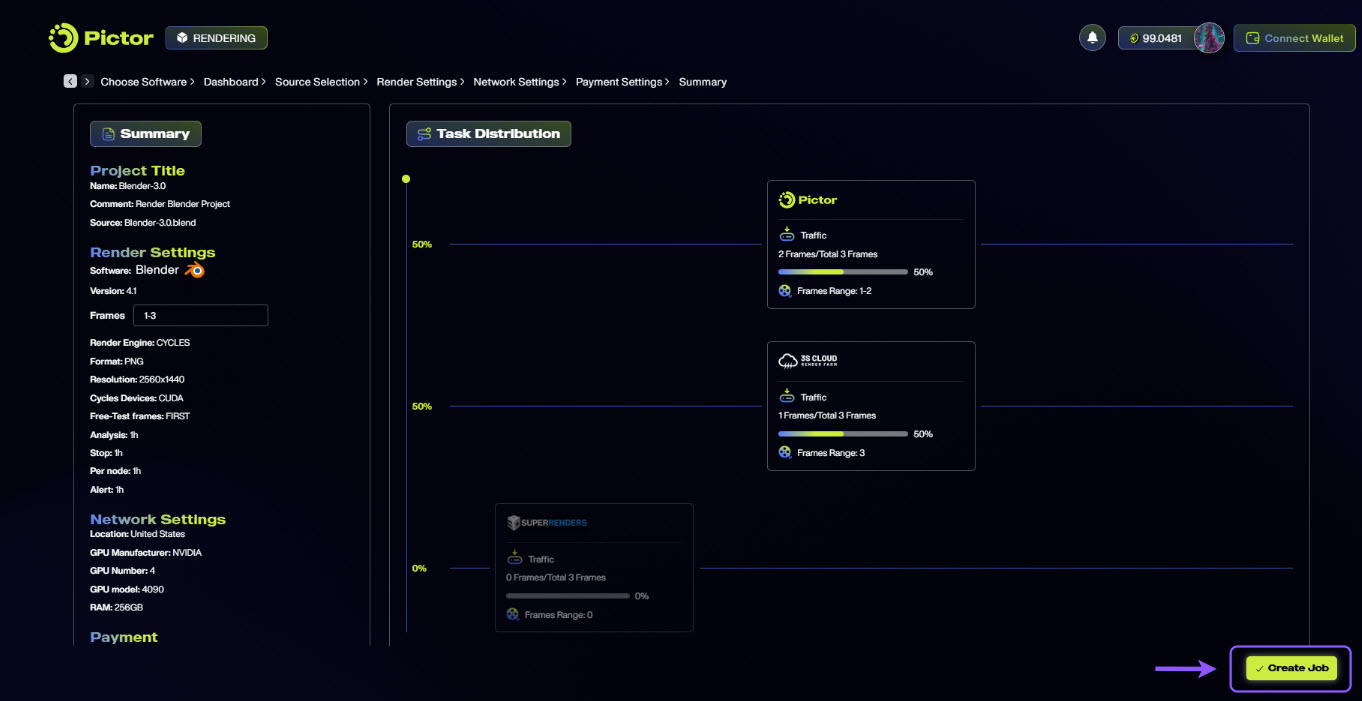
- Check the Summary page
Review your job settings and configurations.
Check the Task Distribution graph to see how the rendering workload is distributed across farms and which farms will handle specific frame ranges.
Then, click the Create Job button to submit your job.
Monitor Rendering Progress
You can track your rendering jobs in real-time, with a detailed breakdown of each frame status (enqueued, processing, or succeeded).
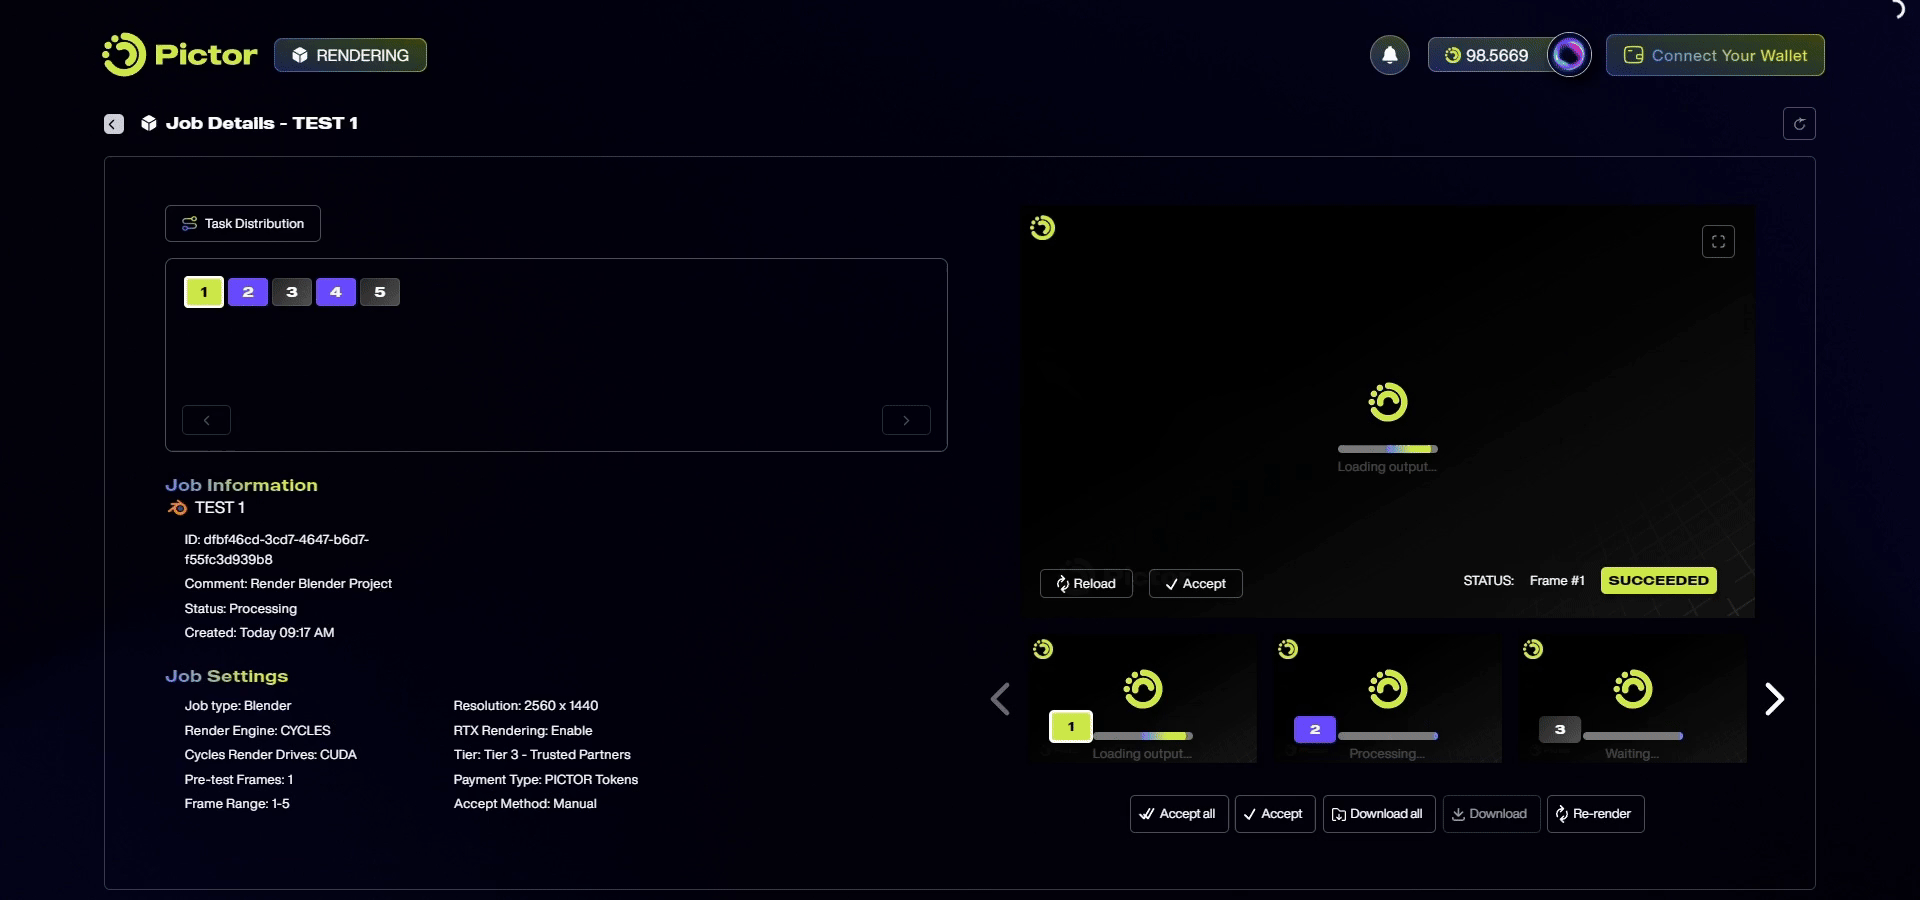
Important: Pictor AI Core Verification
An essential part of the rendering process is the Pictor AI Core Verification. As part of ensuring quality and correctness, the AI Core system scans each frame to verify whether it has been rendered correctly. This step is essential for generating the Proof of Work, confirming that the rendering job meets your requested rendering requirements.
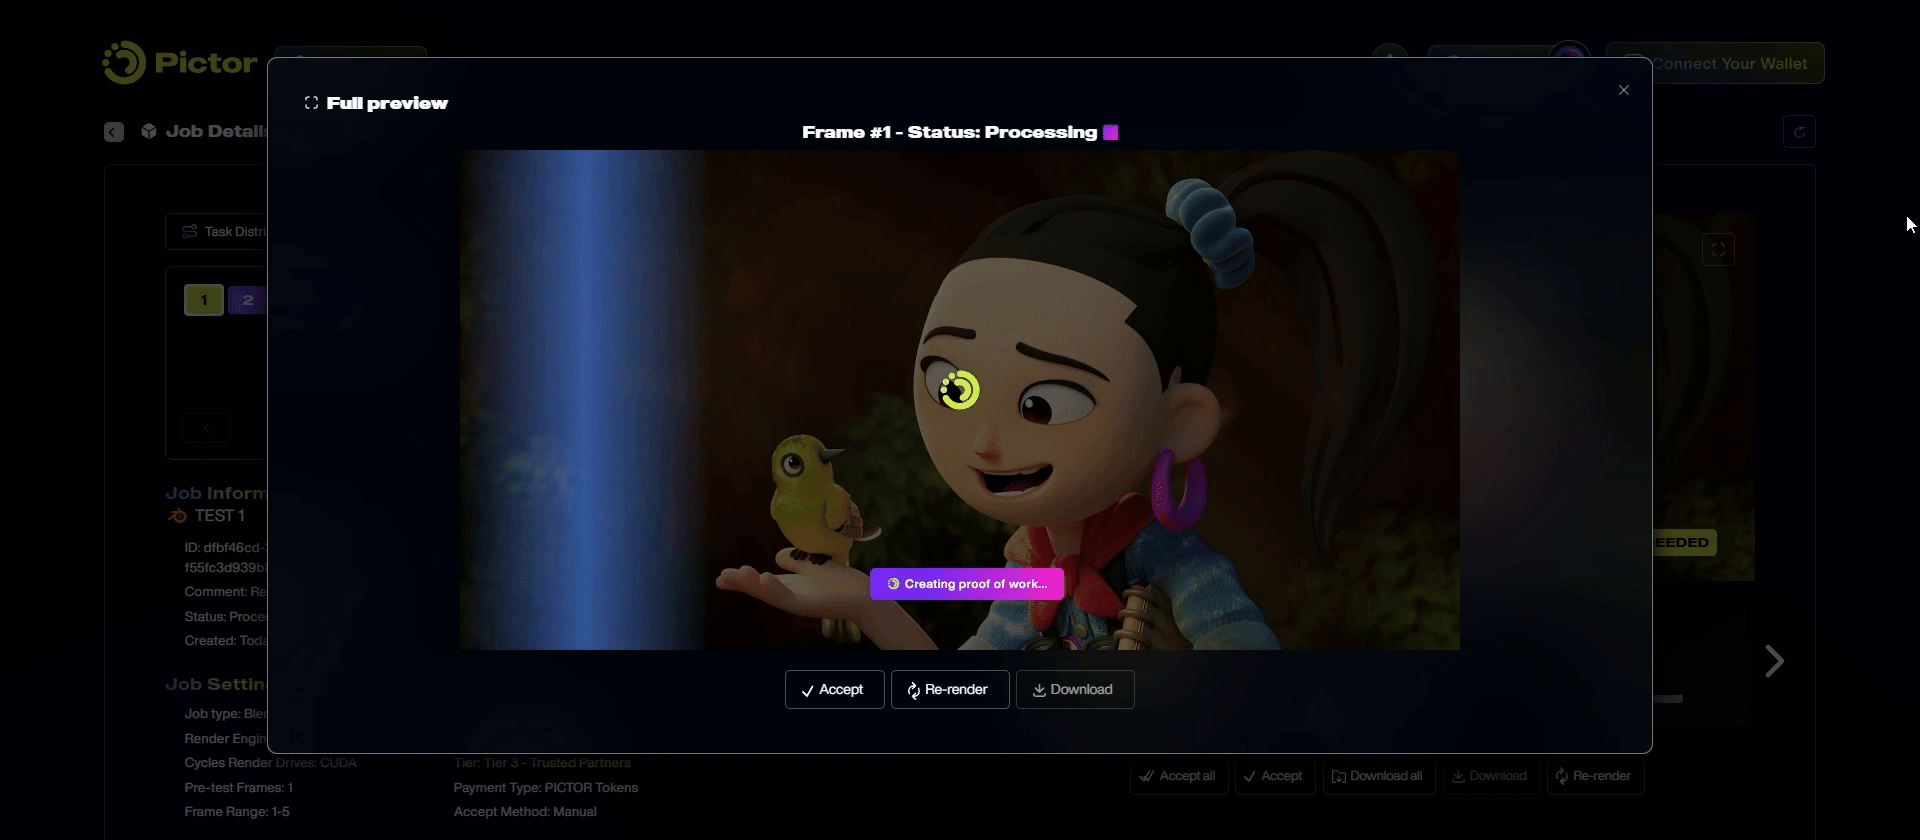
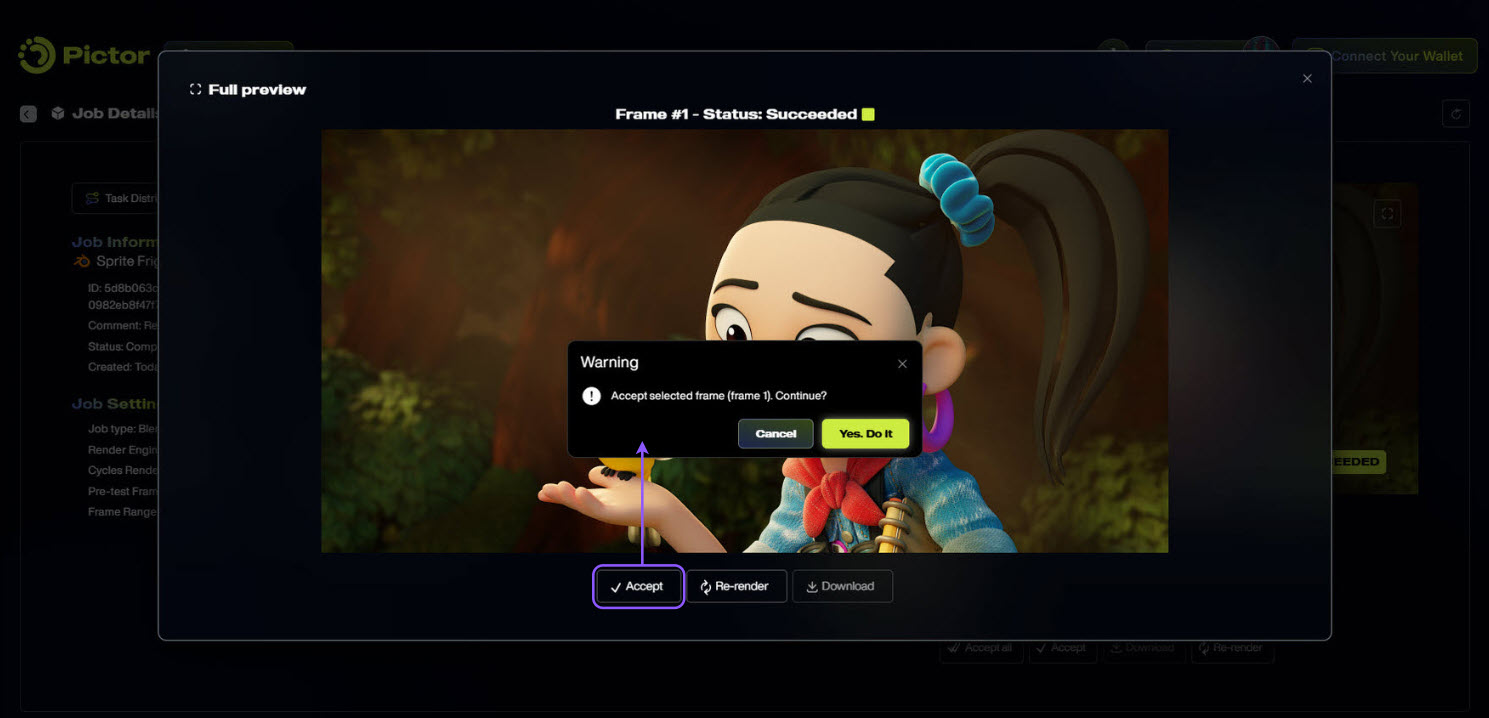
Review Results
Based on our extensive experience in 3D rendering, we have observed that while 95% of tasks are rendered correctly, there is a 5% chance of inaccuracies. To address this, Pictor employs an additional layer of quality assurance. You can review the render results and confirm which frames are rendered correctly to accept and which frames are rendered incorrectly to request re-rendering.

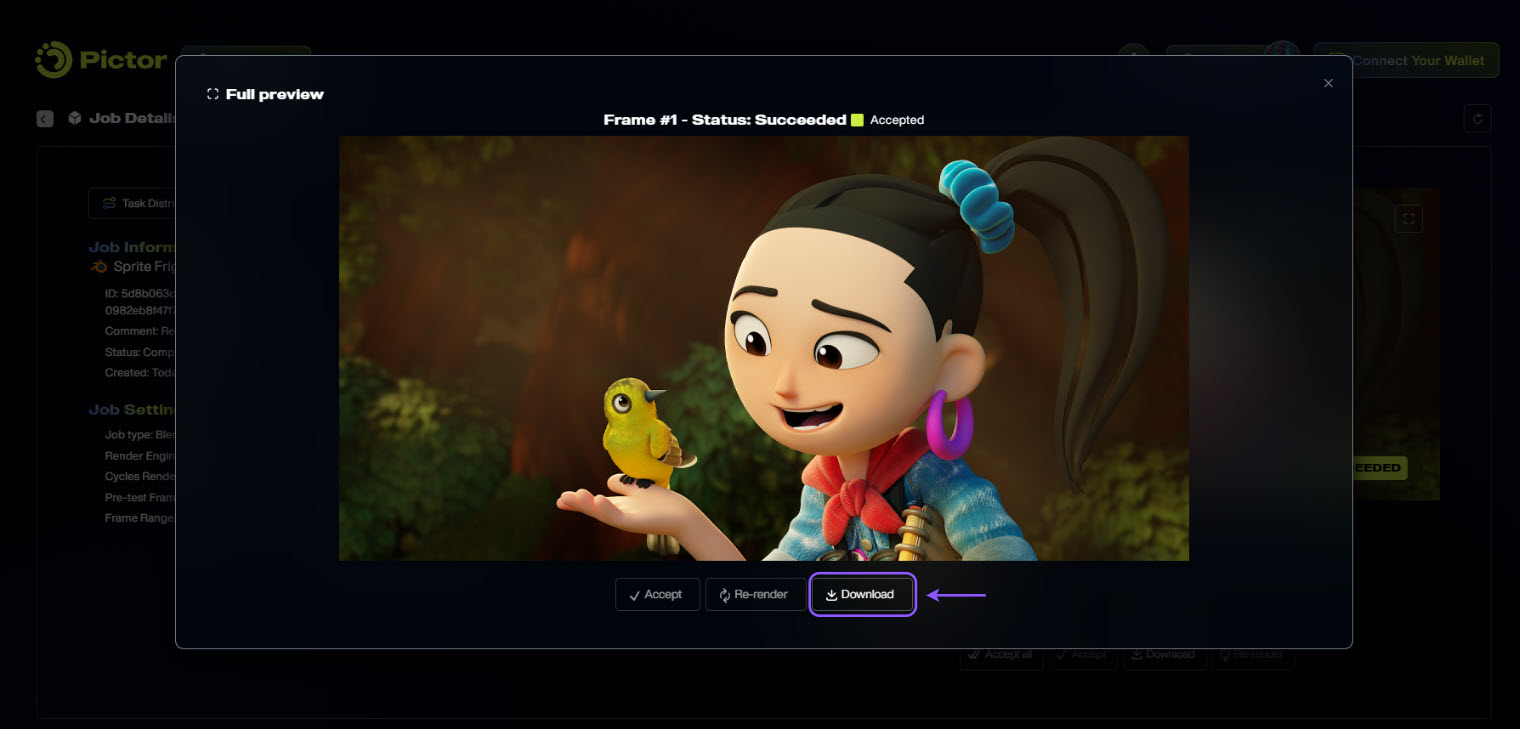
Download Results
After the rendering job is completed and you have accepted it, you can download the final results directly to your devices.
Conclusion
Rendering doesn’t have to be a bottleneck. With Pictor Network, it becomes a launchpad.
If you’re ready to submit your first job or just want a visual walkthrough of the steps, we’ve got you covered.
🎬 Watch the full video tutorial here:
How to Render on Pictor Network
And don’t forget to join the Pictor Network community:
🐦 X | 👥 Telegram Chat | 📢 Telegram Annoucement | 🎥 YouTube | 💬 Discord | 💼 LinkedIn